There is something so quiet and grounding about slowing down for a small seasonal ritual—especially one that transforms the simplest materials into something unexpectedly beautiful.
This year, I found myself drawn away from synthetic dyes and toward something more elemental: red cabbage, herbs from the kitchen, and the soft unpredictability of nature itself.
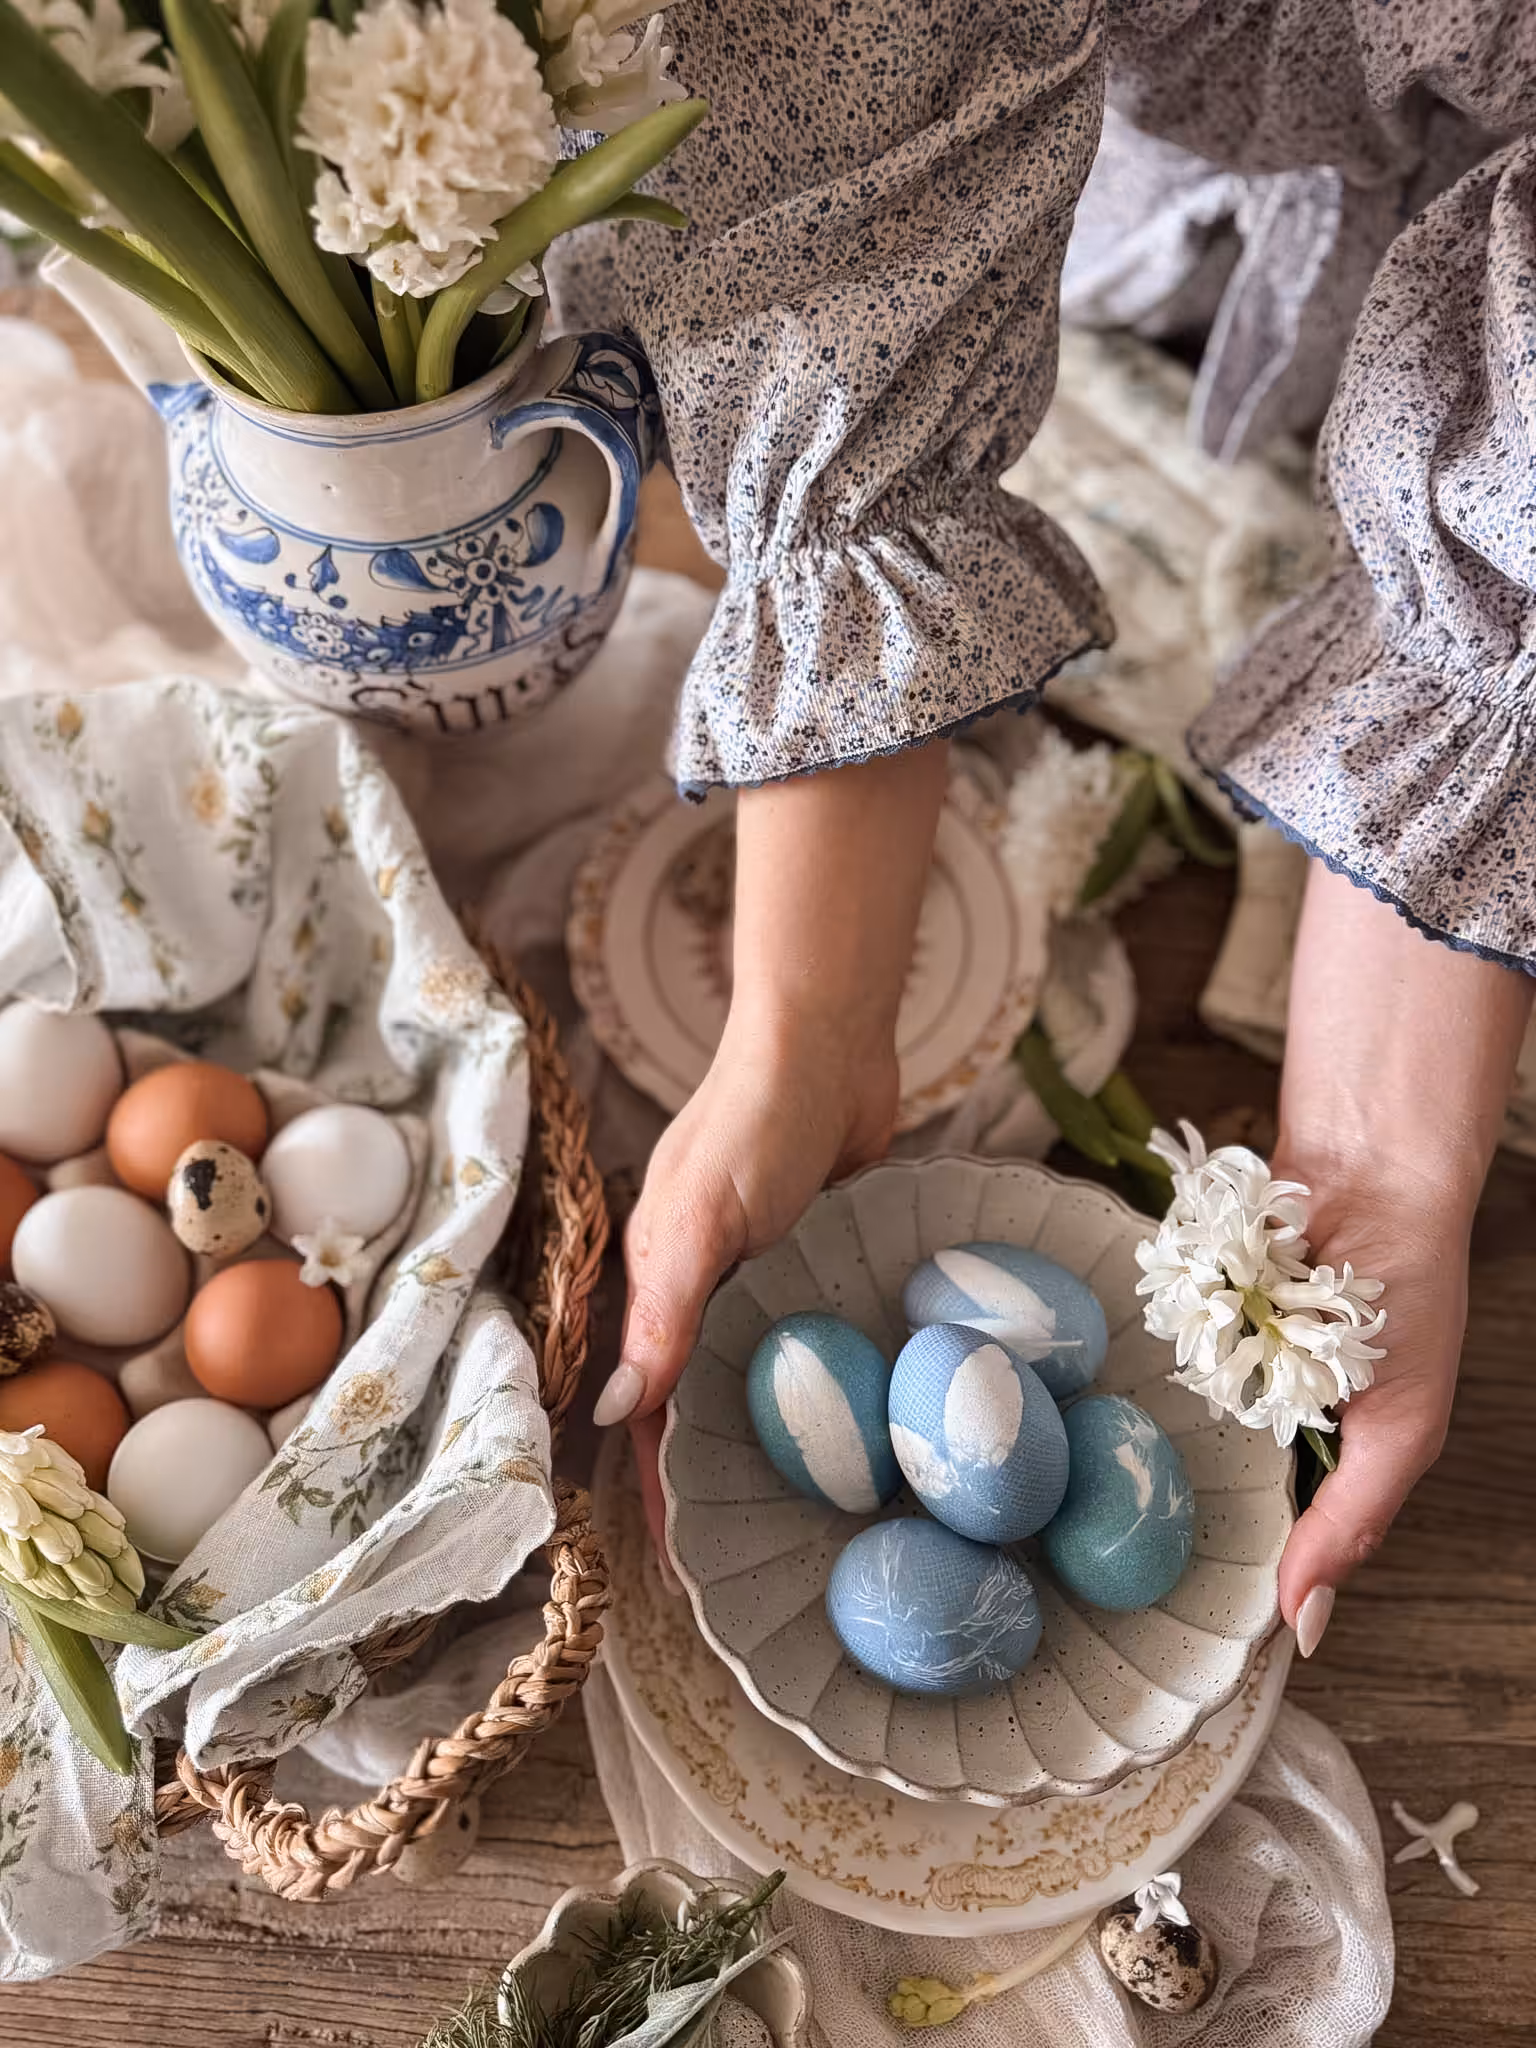
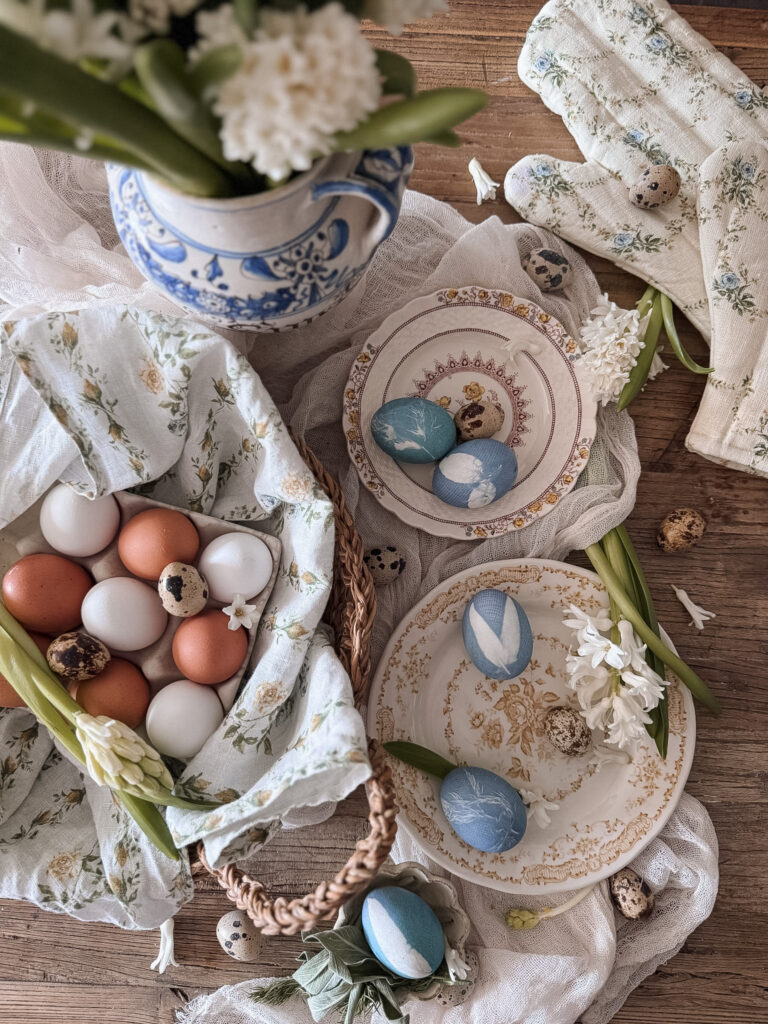
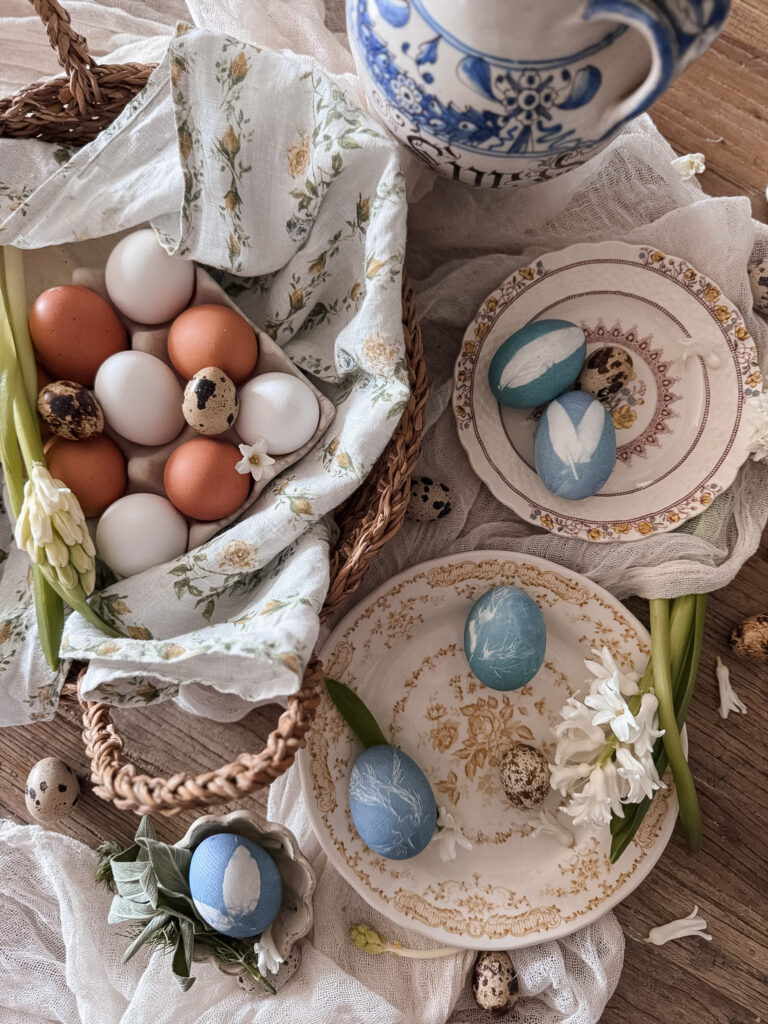
The result is a collection of Easter eggs that feel like spring distilled—washed in soft blues, layered with botanical shadows, and finished with delicate, almost accidental beauty.
White Eggs, hard boiled
½ to 1 Red Cabbage, chopped
Water
White vinegar or rice wine vinegar (optional, for tonal variation)
Fresh herbs or flowers (parsley, dill, thyme, small leaves, edible flowers)
Old stockings or cheesecloth
Pots + bowls
Egg carton or drying rack
Start by roughly chopping red cabbage and placing it into a large pot. Cover with water and bring to a boil, then reduce to a gentle simmer for about 25–30 minutes.
You’ll know it’s ready when the water deepens into a rich violet-blue and the cabbage has lost most of its vibrancy. Strain the liquid and pour it into jars or bowls. Add 1-2 tablespoons of vinegar which allows the dye to stick.
Hard-boil your eggs, then allow them to cool completely before beginning the dye process.
This is where the eggs begin to feel almost like pressed flower studies.
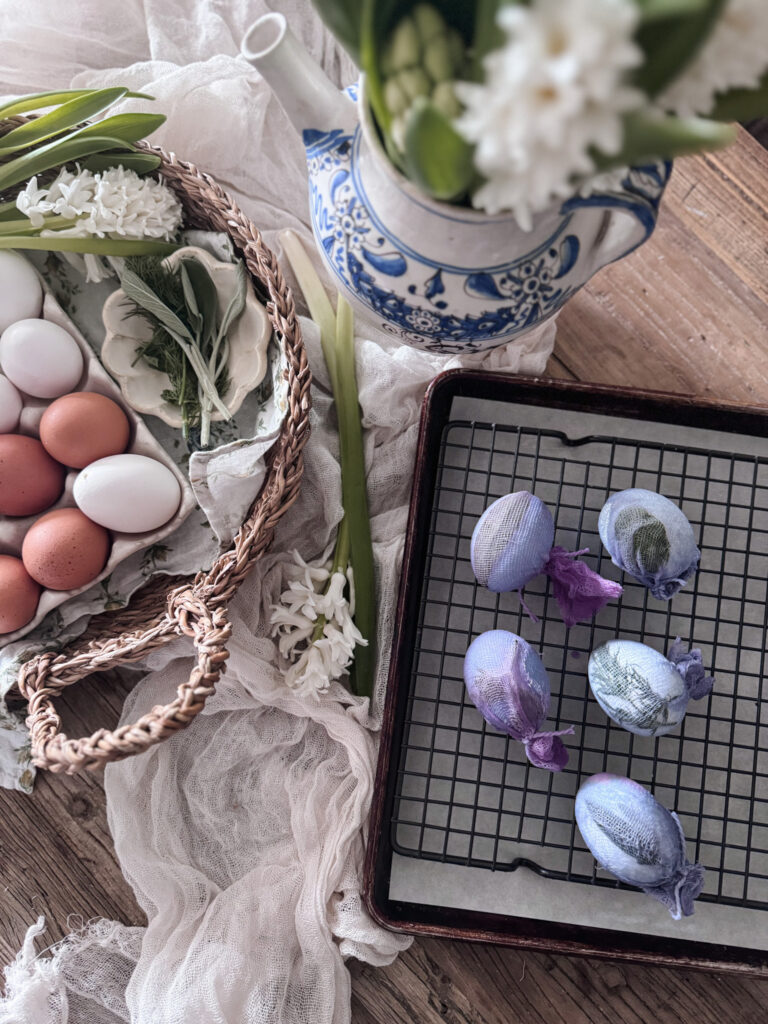
Lightly wet a small herb or leaf and press it gently onto the egg. Carefully wrap the egg in a piece of stocking or cheesecloth, securing it so the plant is held firmly in place.
The tension is important—it’s what creates the crisp silhouette.
Submerge the wrapped eggs into your prepared cabbage dye.
Leave them to soak for roughly 2-3 hrs for a soft, dreamy blue. For more definition in the botanical imprint, allow them to sit closer to 3–4 hours.
Once the eggs are removed from the dye, place them gently on an egg carton lined with parchment or a wire rack.
Allow them to dry for at least 1–2 hours, ideally near a softly open window where air can circulate gently.
This pause is important—it allows the colour to settle and the surface to fully dry before revealing what’s beneath.
When the eggs are dry to the touch, carefully unwrap the stocking/cheesecloth.
This is the most satisfying moment—the slow unveiling of a botanical shadow.
Each egg becomes entirely unique. Some delicate and faint, others bold and graphic.
No two ever quite the same.
What I love most about this process is how little control you actually have over it.
The cabbage decides the colour.
The herbs decide the shape.
Time decides the outcome.
And somehow, that surrender is what makes it feel so beautiful.